I've got a confession, though-- even though I know alterations can make a huge difference in how well a bra fits, I almost never do them. I don't make time, and I don't particularly like/ am not particularly skilled at sewing. I'm grateful for blogs that focus on alterations, so I know how to do it if I ever have more time, and also so I can see that it's really not a big deal to make what seems like major alterations, and is definitely worth it for bras that you really love that aren't quite the right shape for you.
That said, I have a problem in common with most women-- halter bikini tops give me a major headache. This is certainly not a phenomenon just for the full-busted-- when I was looking for a tutorial to help me on my way, I found this lovely video that would be great for those who prefer a typical string bikini.
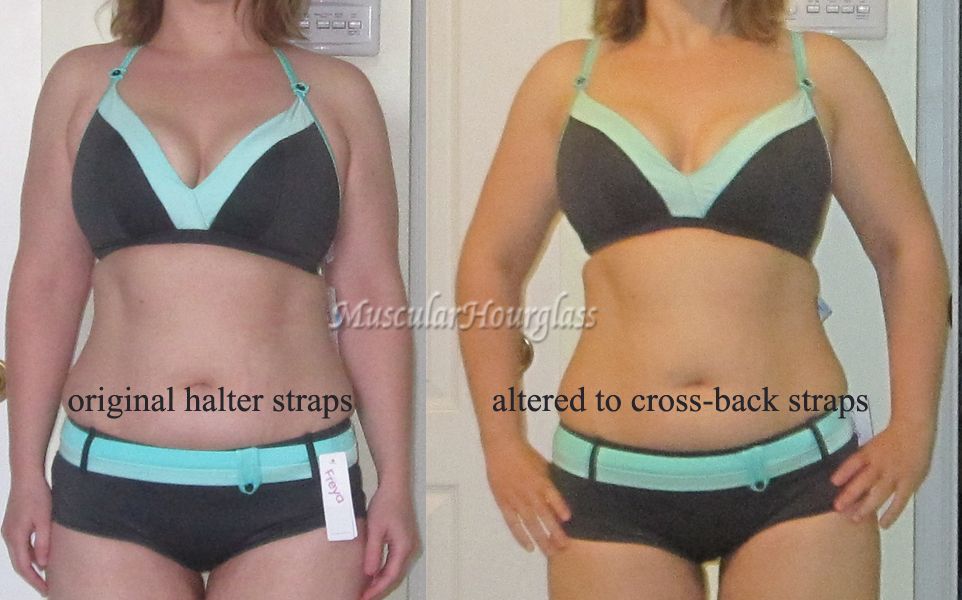
I prefer bra-sized swimwear-- I get better support, and worry-free coverage, and I prefer how they look on my body. However, most bra sized bikinis have a wider back strap, and wider halter straps, which is more comfortable and supportive, but means that the above "sew-free" tying solution won't work.
Here's a basic tutorial for altering a halter top bikini (I'm sure it would also work for a halter one piece)-- since I hardly ever sew, I'll do my best to break it down to the bare basics for those with no sewing experience.
You will need:
- polyester (or polyester coated) thread (polyester will hold up better to water/ swimming pool chemicals much better than cotton)
- a sewing needle (with a hole or "eye" to put thread through)
- two safety pins (to check your alterations before sewing and to anchor the straps in the correct location while sewing)
Skills you'll need:
How to thread a needle
How to do a back-stitch
How to knot a thread (before sewing, and to tie off after sewing)
I chose the back-stitch because it's flexible (swimsuits are made from stretchy fabric!), easy to do by hand, and strong. It also looks a lot like machine stitching to a casual glance, so if you keep it in line with the existing stitching on a garment it will be virtually invisible.
I did this alteration on two different bikini tops-- the Freya Kansas (plunge un-padded underwire-- I own in 30GG) and the Freya Samba (triangle soft-cup-- ASOS still hasn't fixed their awful, faulty "US sizing" issues-- I ordered a 32G which should have been a sister size, and instead got a 32F. I've wanted it for over a year so I kept it anyway).
On to the tutorial!
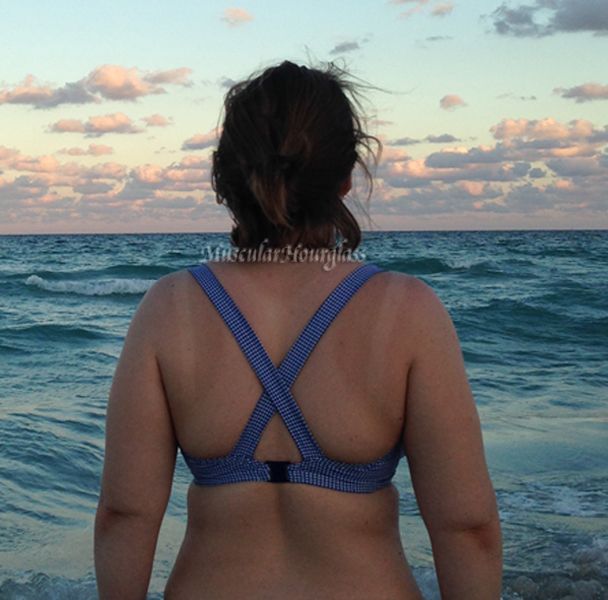
The first part will take the most time, but it's also the most important step. First, you must figure out where you want the straps to attach, and how long you need them to be for both comfort and support. Because I'm short, I normally have more than enough strap to spare, so I chose a cross-strap style. Cross backs will be slightly more difficult to put on (your head goes underneath the crossed straps, and your arms through the holes on the sides of the crossed straps), but mimic the original halter style better, and I think provide more innate shape and support. Crossed straps won't fall off, either, which is a plus if you actually swim in the suit. However, if you have a longer torso or are taller, there may not be enough strap length to cross, in which case a straight strap (like a traditional bra strap) might work better for your needs.
At first, I thought a dramatic cross that goes all the way to the other cup would look different and nice, but it was difficult to put on, cut in on my back, and wasn't very flattering to my build. It did feel very supportive, though! Just not the best for me.
I moved the straps to about halfway along the length of the opposite back-strap (make sure that the straps are oriented correctly so they aren't twisted!), took about an inch of strap below the attachment point, and liked the way the straps felt on and how the top looked.
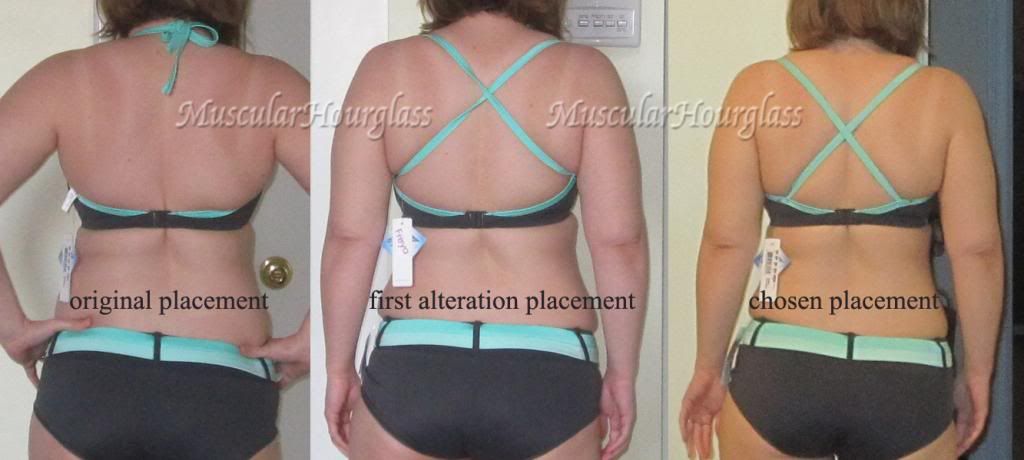
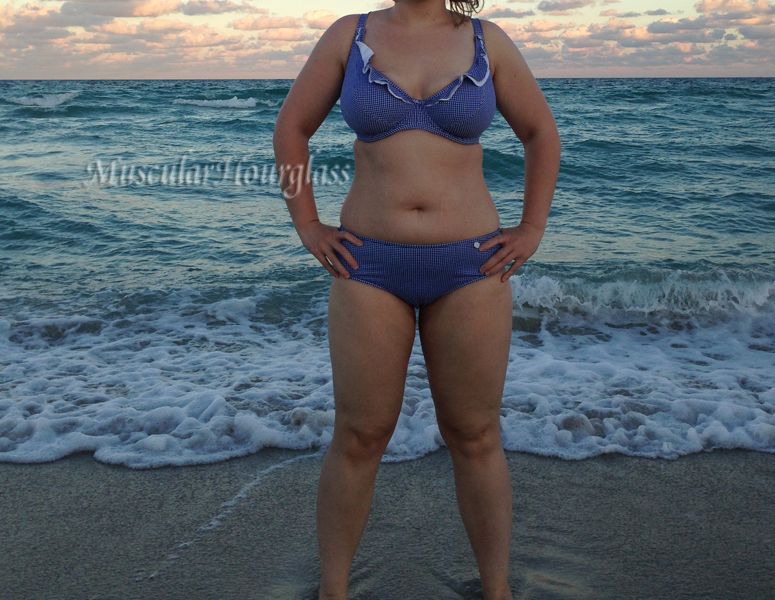
The alteration dramatically increases the comfort of the swimsuit, but does slightly change the appearance from the front-- especially since I make a point of positioning the straps so they don't cross over my trapezius muscle, which is what causes headaches and neck/shoulder pain for me.
The actual alterations took maybe 10 minutes per suit. This varies depending on your skill, fastidiousness, and practice, but it really shouldn't take long even if you barely know how to sew.
Wait! One last time, before you get out your needle and thread, run your hand along each strap starting at the top of the cup, and going all the way to where the strap is safety pinned to the band. If the strap stayed flat along your finger the whole way for each strap (and didn't rotate over), you are ready to start sewing (a quick rotation and re-pinning is all you'll need to do, otherwise).
 |
| Straps lay flat, are pinned in good location, ready to sew! |
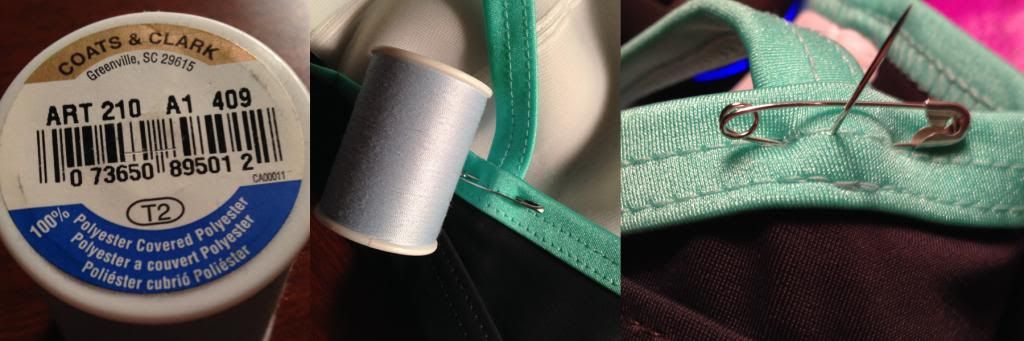 |
| This was the polyester thread I had on hand. It didn't match either suit, but the poor match isn't obvious since I kept the stitches neat. |
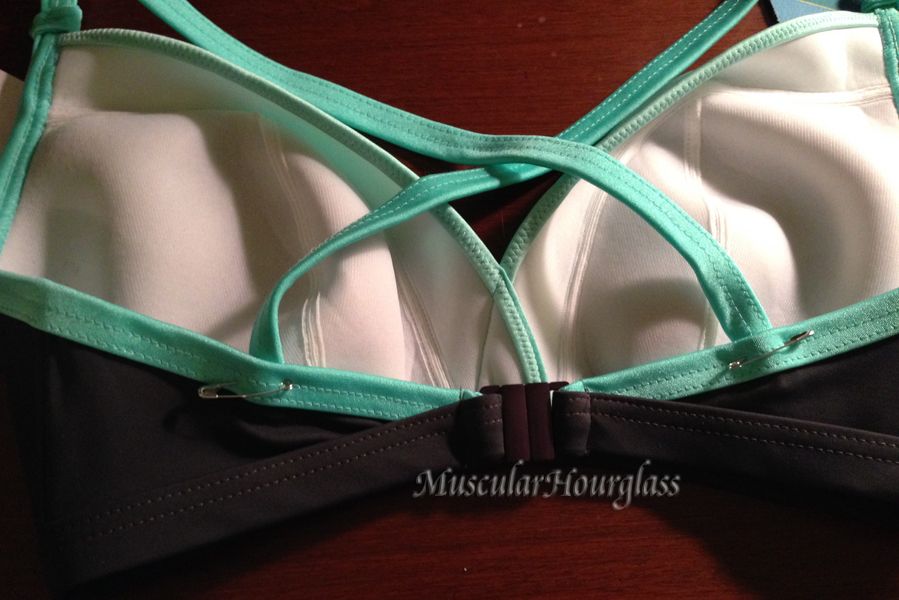
Completed alterations, from the inside and from the outside:
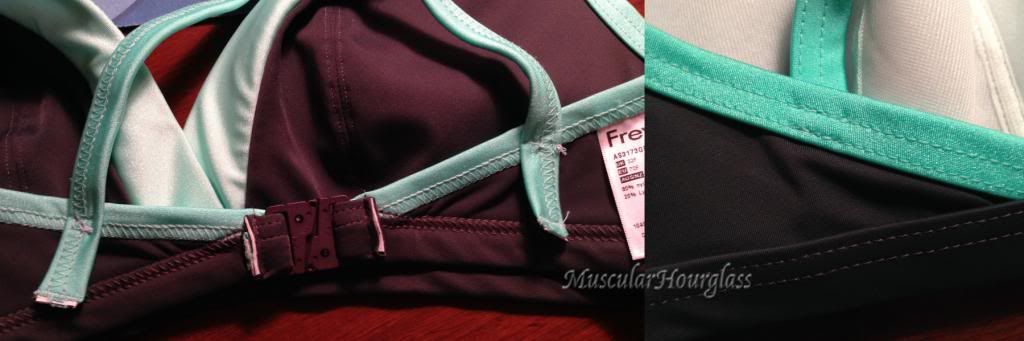 |
| I chose to stitch along both rows of pre-existing stitching--extra reinforcement so there's no chance for any stitches to come loose! |
If you need to alter more than one swimsuit, the second alteration will go much faster. This time I placed the straps more toward the center of the back on the other bikini.
(Altered) Kansas on the beach
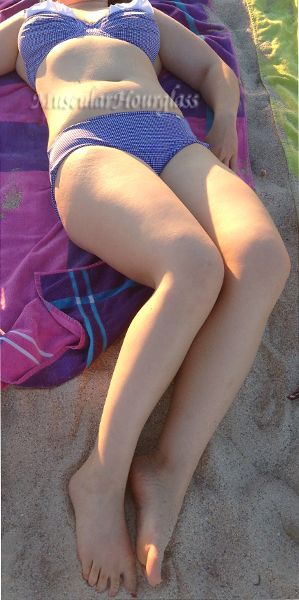

These altered bikinis were the perfect apparel for a comfortable trip to the ocean with my husband and our good friends.
Great tutorial! I can't sew, either, so I appreciate the clear instructions.
ReplyDeleteI'm so glad it was helpful! Everything is difficult when you have no idea how to do it.
DeleteThis comment has been removed by a blog administrator.
ReplyDeleteThis comment has been removed by a blog administrator.
ReplyDelete